
- Home
- Choose Your Klip
- About Klevaklip
- Deck Building Products
- Snap-Loc for Modwood® Decking
- Snap-Loc for Trex® Decking
- Merbau Clips
- KLEVAKLIP Installation Guides
- Contact us
- Online Shop
Click here for AJH38G PDF Install Steps
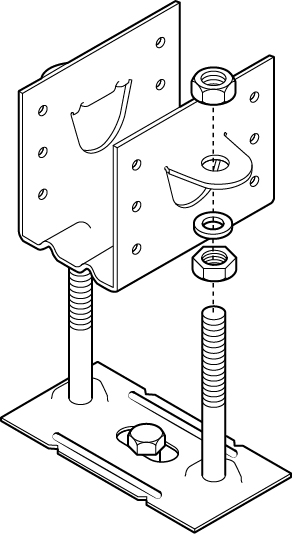
Note: Each Adjustable Joist Support (joist holder + base plate) requires (Galvanised) 2 x 3/8 inch Hex Head Bolts, 4 x 3/8 inch Nuts, 2 X 3/8 inch washers & 1 x 1/2 inch x 2 inch Galvanized Masonry Screw Anchor or similar.
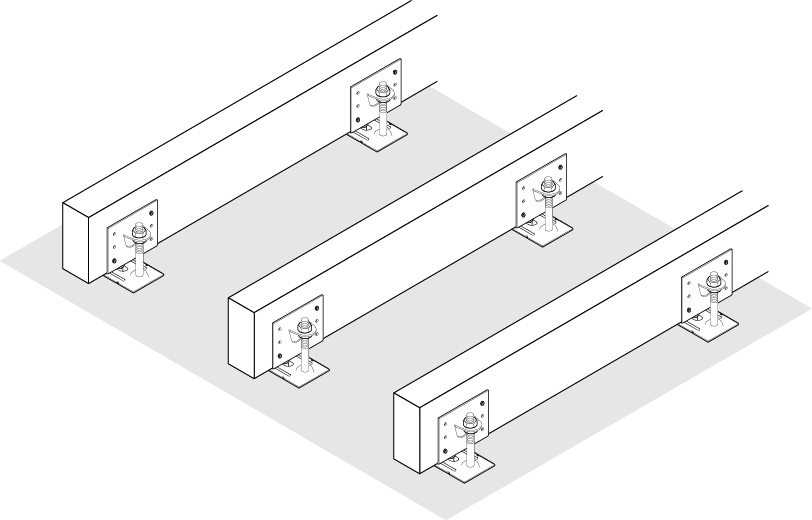
Mark out positions for the base plates on the concrete slab (see table for minimum span requirements for various width joists) These are all based upon “continuous span” with joists at 16 inch between centers. Either use a “straight edge” or run a string line from one of the notches in the outer base plates and flick the line for the positions of the internal base plates.
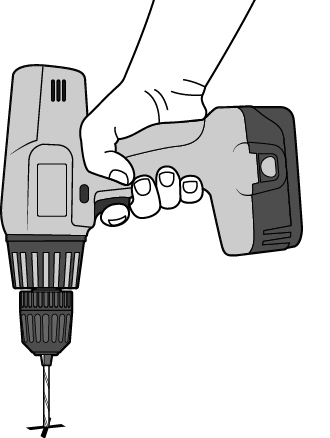
Drill holes for base plates (or for joist supports if securing them directly to concrete) using 1/2 inch masonry bit.
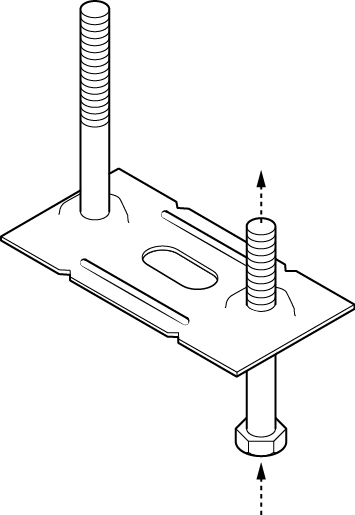
Insert 3/8 inch hex-bolt through base plate.
Note: The KlevaKlip Adjustable Joist Support system is designed to provide a "top of the joist" height from 4 1/4 inches (using 2 1/2 inch length bolts + 2 inch x 4 inch joists) to 8 1/2 inch (using 5 inch length bolts + 2 inch x 6 inch joists).
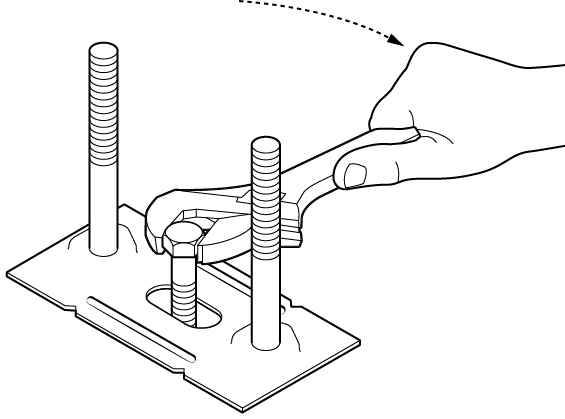
Fix base plate to concrete using 1/2 x 2 inch long galvanized screw anchors. Repeat steps 1 - 4 for all base-plates to be installed.
Tip No. 1 Before fully tightening masonary anchors, either use a straight edge or run a string line along the edge of the base-plate vertical bolts to ensure they line up correctly. Adjust base-plate in the slot if required.
Tip No. 2 Check all base-plates are "square" to the above-mentioned straight edge or stringline
Attach joist support onto hex bolts and adjust to approx height required. Semi-tighten nuts - this will tighten the whole structure enough to withstand joists being inserted and secured
Adjust joist to correct height using dumpy or laser-level or string line. (Note - you will need to loosen the nuts off if the joist support height needs adjusting)
Fully tighten nuts locking the joist support
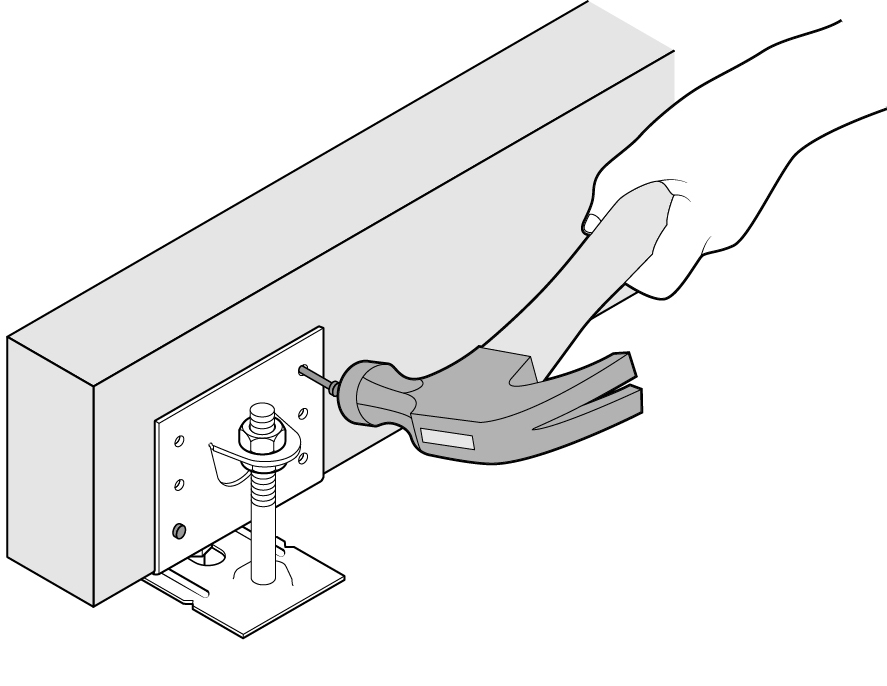
Insert joist into joist support and secure with minimum 2 x either 9 gauge, 8D, 10D 1 1/2 inch hot dip galvanized connector nails or 2 x 9 gauge 1 1/2 galvanized connector screws on each side of the joist support.
Tip - when fixing nails, brace the other side of the joist support with your foot to minimise vibration.
We quite often find that people have miscalculated the number of adjustable joist support required for their decking area. We believe the main cause of this is that people work out the length of their joists, and simply divide by the "support spacings" (taken from our span table) they have decided on between the supports - eg - having a 9ft 10 inch length joists with spacings of 3 ft 3 inch to give 3 supports.
Wrong! - This does not take into account the initial support at the start of the joist.
Therefore, the correct answer would be 4.
Similarly, when working out the number of joists required, you need to work out the number of "joists spacings" along your deck and remember to add one for the initial joist.
So, to finalise the number of supports you will need for your deck, multiply the number of joists on your deck by the number of supports to be placed along your joists. This should give you an accurate answer.
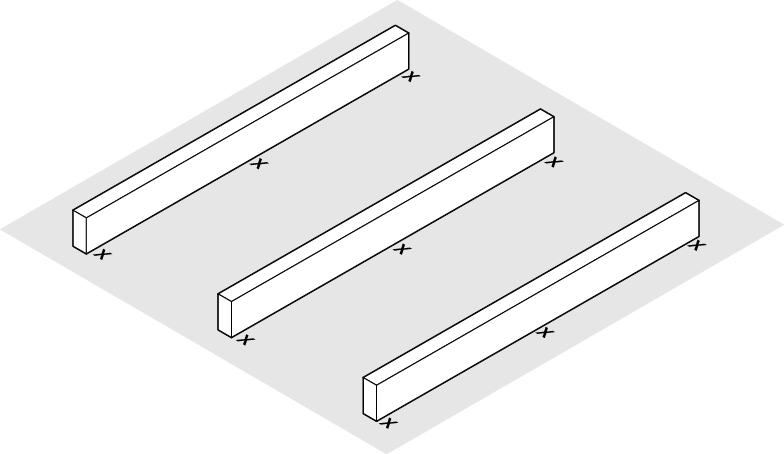
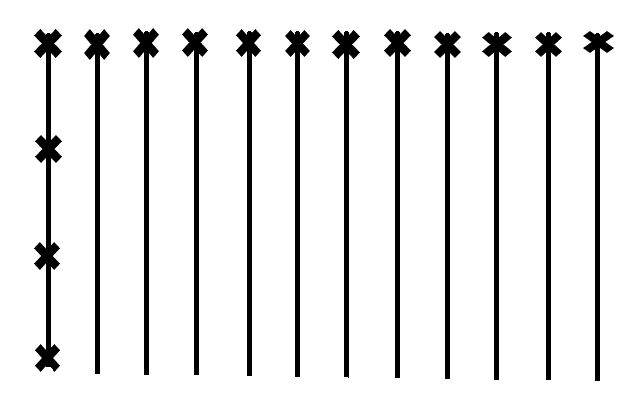
IF IN DOUBT - DRAW A SMALL DIAGRAM WITH CROSSES FOR YOUR SUPPORTS AS SHOWN BELOW AND SIMPLY COUNT THEM UP.
IN THIS EXAMPLE YOU WILL NEED 48 ADJUSTABLE JOIST SUPPORTS
The KlevaKlip Adjustable Joist Supports system has been independently tested to support a load bearing capacity of 60 PSF when used at the recommended joist spans listed below.
KlevaKlip Joist Supports and Base Plates have been hot dip galvanised in accordance with International Standards ISO 1461:2009 and USA Standards ASTM A123.
All based upon “continuous span” with joists set at 16 inches between centres.
All joists should be pressure treated for outdoor use.
| Joist Size | Recommended Span (feet) | Maximum Span (feet) |
| 2 x 4 inch | 3 ft 3 inch | 4 ft 11 inch |
| 2 x 6 inch | 4 ft | 6 ft * |
* Joist span limited by lateral loading on bolts
Note: All measurements based on using Galvanised long-threaded hex head bolts.
| Hex Head Bolt Length | Min Height to Bottom of Joist | Max Height to Bottom of Joist | Min Height to Top of 4/6 inch Joist | Max Height to Top of 4/6 inch Joist |
| 2 1/2 inch | 5/8 inch | 1 inch | 4 1/4 / 6 1/4 inch | 4 1/2/ 6 1/2 inch |
| 5 inch | 3/4 inch* | 3 1/4 inch | 4 1/2*/ 6 1/2 inch | 6 1/2 / 8 1/2 inch |
| **No Bolt | 1/4 inch | 3 3/4 / 5 3/4 inch |
* If using long bolts at low heights, to prevent the bolts protruding past the top of joist, the end of the bolt will need to be cut off.
** When Using Joist Support Only.