
- Home
- Choose Your Klip
- About Klevaklip
- Deck Building Products
- Snap-Loc for Modwood® Decking
- Snap-Loc for Trex® Decking
- Merbau Clips
- KLEVAKLIP Installation Guides
- Contact us
- Online Shop
Download PDF Install Instructions
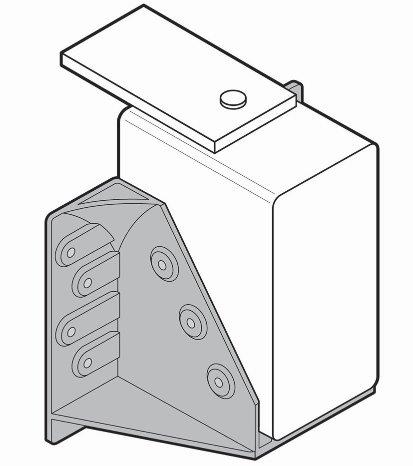
Important Notes: Use only 35mm long x 3.15 diameter galvanised connector nails or stainless steel equivalents. When fixing the FREP Joist Hangers to Bearers.
NJH9045 there should be four nails in each “wing” of the Joist Hanger (Total 8) and three nails per side of each joist at each joist hanger (Total 6)
NJH14045 there should be six nails in each “wing” of the Joist Hanger (Total 12) and five nails on one side and four on the other side of the joist hanger (Total 9)
Please use connector nails in ALL holes provided for both the NJH9045 and NJH14045.
Nail guns are not to be used on FREP Joist Hangers.
Check span tables at the end of these instructions to ensure bearers are spaced within recommended maximum distance for the hanger to still meet Australian Standards for relevant kPa ratings. Mark out positions for where the joist hangers will be attached to the bearers.
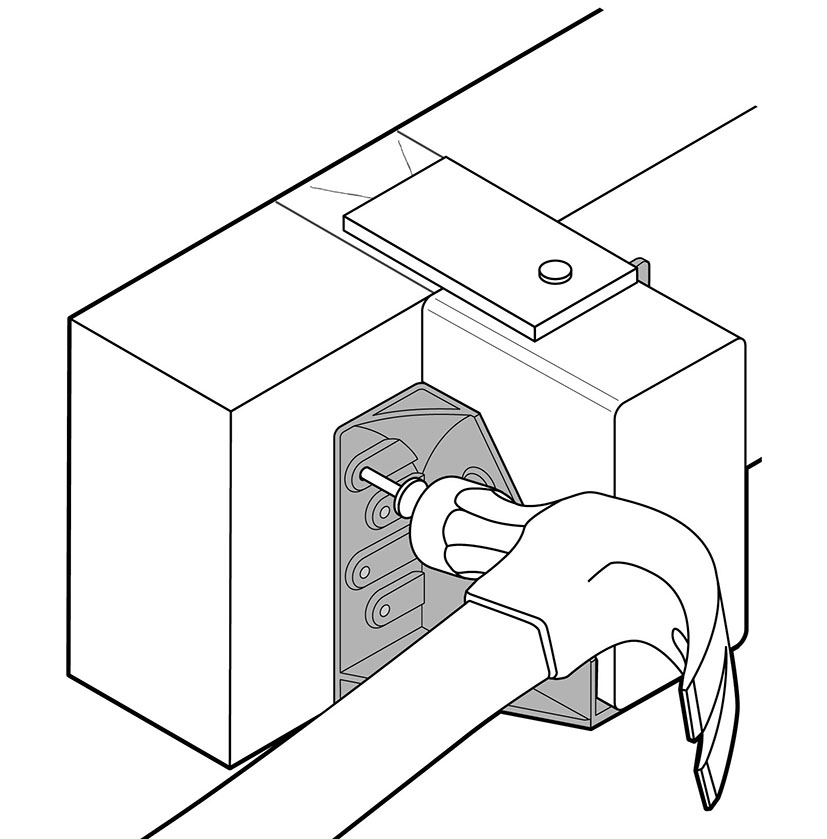
FREP Joist Hangers are “sprung” slightly inwards during manufacture. When fixing the hangers to the face of your bearers, it is important to sit a small section of joist (say 40mm long) in the hanger to ensure the sides of the hanger are set to the correct width of joists to be used when attached. Good practice is to nail a small piece of thin ply wood or similar to the top of this small section of joist. This “jig” makes it easy to set the hangers at the correct height to your bearer.
Insert the Joist Hanger into the “Jig””and place in required position against the bearer ensuring the hanger is sitting at the correct height to the bearer.
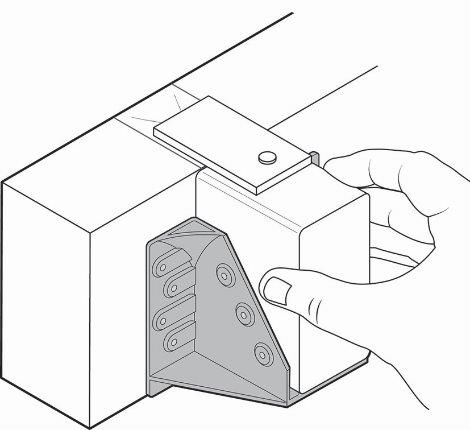
Attach to top left and right hand connector nails of the hanger to the bearer.
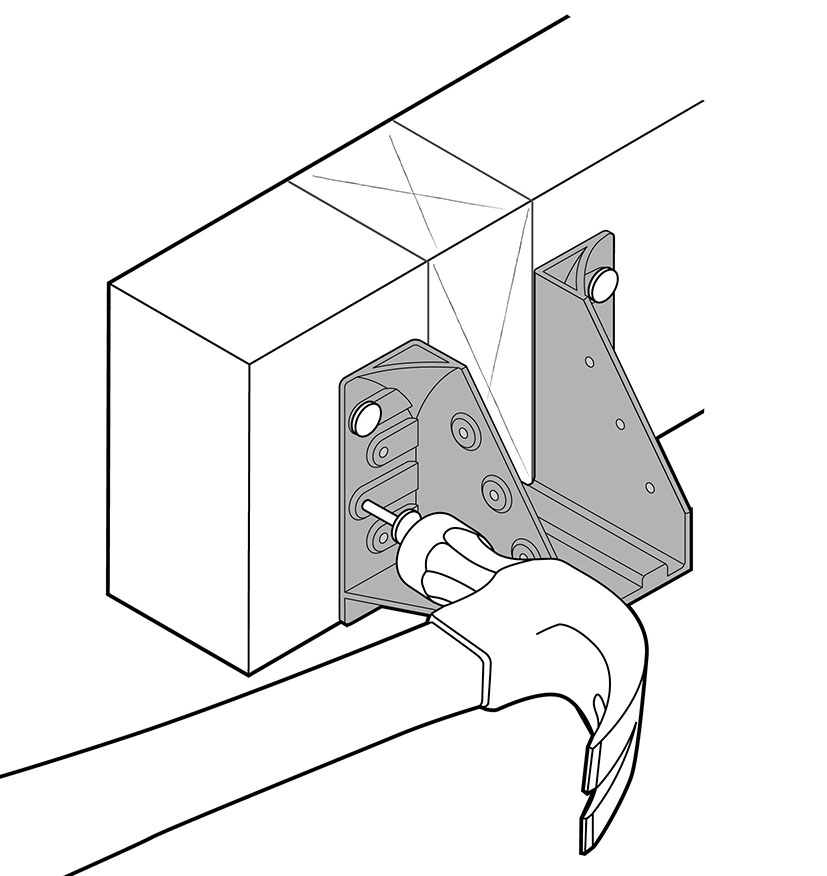
Once both top left and right hand connector nails are in place remove the “”Jig”” and insert the remaining nails to attach the hanger to the bearer –
NJH9045 there should be four connector nails in each “wing” of the joist hanger (total 8).
NJH14045 there should be six connector nails in each “wing” of the joist hanger (total 12).
Repeat process for the remaining FREP joist hangers.
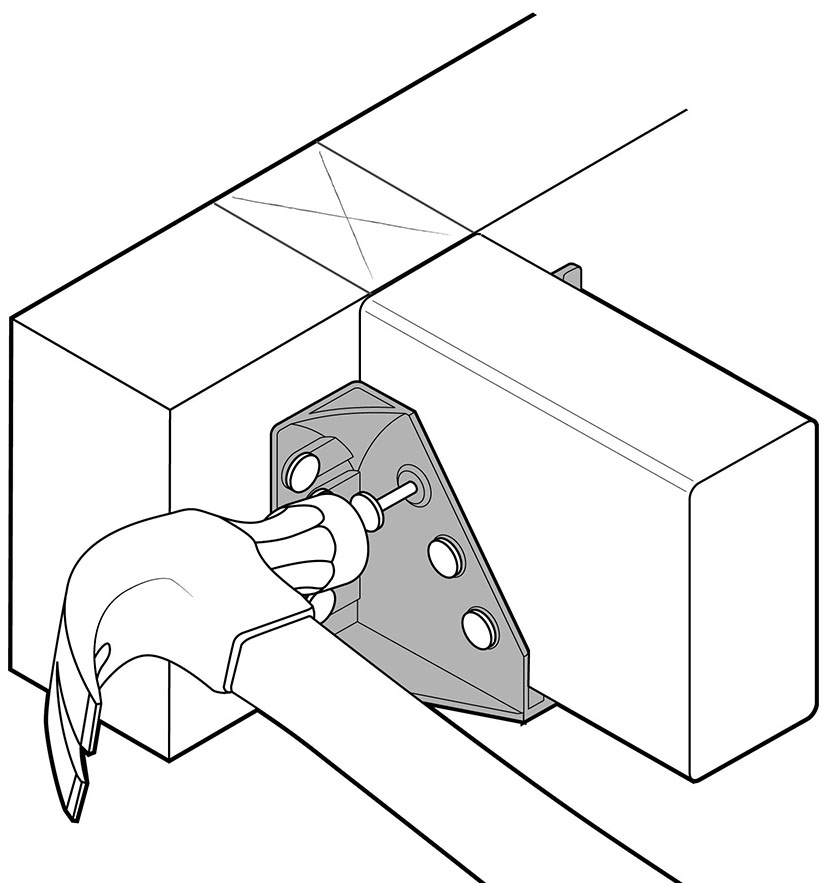
Cut Joists approximately 1mm less than the distance between the bearers, then insert joists into hangers. Double-check that height of joists are correct before nailing off joists.
NJH9045 use three connector nails per side of each joist at each joist hanger (total 6).
NJH14045 use five nails on one side and four on the other side of the joist hanger (Total 9)
Also it is good practice to brace the opposite side when nailing into the joist.
All load bearing tests have been done by an independent, accredited testing body to Australian Standards AS1170.0 and AS1170.1
Note: span table should be read in conjunction with timber span and joint tables to ensure the size and grade of joist you use is adequate for the proposed span.
|
Timber Joint Group |
NJH9045 |
NJH14045 |
|||
|
Floor |
Deck/Balcony |
Floor |
Deck/Balcony |
Commercial |
|
|
JD5 (equivalent to MGP10) |
0.8 |
0.6 |
1.2 |
0.9 |
0.5 |
|
JD3 (equivalent to F17 LVL) |
1.2 |
0.9 |
1.6 |
1.2 |
0.7 |